Monday, December 12, 2011

Adding JSON support to domain objects and controllers

This post shows how you can add JSON support to your applications using Spring Roo. The information in this post has been taken from Spring Roo 1.1 Cookbook.

Step 1: Download Roo scripts and sample code from the following location:http://code.google.com/p/spring-roo-cookbook/downloads/list#columnprefs

Step 2: Execute the ch04_web-app.roo script that creates the flight-app Roo project, sets up
Hibernate as the persistence provider, configures MySQL as the database for the application,
creates the Flight and FlightDescription JPA entities, and defines a many-to-one
relationship between the Flight and FlightDescription entities. If you are using a
different database than MySQL or your connection settings are different than what is specified
in the script, then modify the script accordingly.

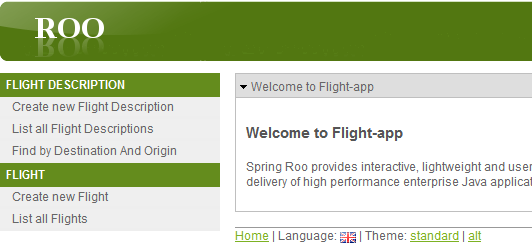
Step 3: Execute the controller all command to create controllers and JSPX views corresponding
to JPA entities in the flight-app project, as shown here:
.. roo> controller all --package ~.web
Execute the perform eclipse command to update the project's classpath settings, as
shown here:
.. roo> perform eclipse
Now, import the flight-app project into your Eclipse IDE.

Step 4: To add the json support execute the json add command against the Flight JPA entity:
~.domain.Flight roo> json add --class ~.domain.Flight
Updated SRC_MAIN_JAVA\...\domain\Flight.java
Created SRC_MAIN_JAVA\...\domain\Flight_Roo_Json.aj
Created SRC_MAIN_JAVA\...\web\FlightController_Roo_Controller_Json.aj

Executing the json add command creates
a *_Roo_Json.aj AspectJ ITD, which defines methods for converting objects of the class to
JSON documents and vice versa, as shown here:

import flexjson.JSONDeserializer;
import flexjson.JSONSerializer;

privileged aspect Flight_Roo_Json {
  public String Flight.toJson() {
    return new JSONSerializer().exclude("*.class").serialize(this);
  }
  public static Flight Flight.fromJsonToFlight(String json) {
    return new JSONDeserializer().use(null, Flight.class).deserialize(json);
  }
  public static String Flight.toJsonArray(
    Collection collection) {
    ...
  }
  public static Collection
    Flight.fromJsonArrayToFlights(String json) {
     ...
  }
}

The following code shows the FlightController_Roo_Controller_Json.aj ITD, which
was generated:
import org.springframework.http.ResponseEntity;
import org.springframework.web.bind.annotation.ResponseBody;

privileged aspect FlightController_Roo_Controller_Json {

   @RequestMapping(value = "/{flightId}", method = RequestMethod.GET, 
     headers =  "Accept=application/json")
  @ResponseBody
  public Object FlightController.showJson(@PathVariable("flightId") Long flightId) {
    Flight flight = Flight.findFlight(flightId);
    if (flight == null) {
         HttpHeaders headers= new HttpHeaders();
         headers.add("Content-Type", "application/text");
         return new ResponseEntity(headers, HttpStatus.NOT_FOUND);
    }
    return flight.toJson();
  }
  ...
}

Monday, November 28, 2011

Spring Roo 1.1 Cookbook review by Cengiz Öner

I just came across review of Spring Roo 1.1 Cookbook by . Many thanks to Cengiz for writing the review :)

You can visit Cengiz's blog and read the complete review here : http://gwtsts.blogspot.com/2011/11/review-spring-roo-11-cookbook-by-ashish.html

Monday, October 31, 2011

Tuesday, October 18, 2011

Spring Roo presentation

Last week I gave a presentation on Spring Roo in Silicon India conference held in Hyderabad. I tried my best to give a complete example that makes use of Spring Roo features to develop a Flight Booking application. Link to PDF: http://www.siliconindia.com/events/siliconindia_events/Java_Hyd_Conf/Ashish_Spring_Roo.pdf

Wednesday, October 5, 2011

Quick introduction to AspectJ ITD

In this post, I'll show a few examples of AspectJ ITDs that are generated by Spring Roo and the declarations contained in those ITDs. You'll find a more detailed discussion in Chapter 1 (which is available for download) of Spring Roo 1.1 Cookbook.

Example 1: FlightService_Roo_ToString.aj
package sample.roo.flightapp.service;

privileged aspect FlightService_Roo_ToString {
   
    public String FlightService.toString() {
        StringBuilder sb = new StringBuilder();
       sb.append("Origin: ")
         .append(getOrigin());
        return sb.toString();
    }
} 

The following figure shows what the above declaration implies:


Example 2FlightService_Roo_Serializable.aj

package sample.roo.flightapp.service;

import java.io.Serializable;

privileged aspect FlightService_Roo_Serializable {
   
  declare parents: FlightService implements Serializable;
   
  private static final long FlightService.serialVersionUID
      = 5059552858884348572L
}


The following figure shows what the above declaration implies:


Tuesday, October 4, 2011

Spring Roo 1.1 Cookbook promotion at Javaranch

This week I'll be responding to questions related to Spring Roo in the Spring forum of Javaranch (http://www.coderanch.com/forums/f-96/Spring). You can win a copy of the book by posting questions in the Spring forum.

Spring Roo - future of Java application development

Traditional Java enterprise application development required developers to write the boilerplate code. The Spring Framework simplified Java enterprise application development with DI and POJO-based approach to developing applications. No wonder, Spring Framework has become the most popular platform for developing applications.

Spring Framework simplifies developing enterprise applications using standard technologies, like JPA, Hibernate, JDBC, Flex, JavaMail, JMS, and so on. Still, you need to write some generic configuration and generic code which can be generated by a tool. Let's look at a few examples:

1. If you write a class, you normally override the toString method
2. If you write a JPA entity class, then you provide getter/setters methods for persistent fields, method to obtain reference to EntityManager, create persistence.xml, and so on.
3. When using Spring Web MVC, you need to configure handler mappings, create controller classes corresponding to JPA entities, create JSP views, and so on.
...

And the list goes on and on, depending upon the technology or framework that you are using. If all these generic configurations and code are generated and managed by a development tool, developers will be more productive. And, if the code generated follows best practices of development, then you don't need to even worry about incorporating best practices in your application architecture. This is where Spring Roo comes as the next generation productivity improvement tool.

Spring Roo generates generic configurations and code to help developers focus on writing the business logic. There are no runtime dependencies of application on Spring Roo, and you can easily modify the Roo-generated code by using Push-in refactoring. So, even though you are using a productivity improvement tool, you have full control over modifying the generated code, and you don't need to learn any new language or frameworks to do so. If you know Spring, you can easily get started with using Spring Roo effectively. Spring Roo truely defines the future of enterprise Java application development.

Thursday, September 29, 2011

How to get the most out of Spring Roo 1.1 Cookbook

The recipes covered in Spring Roo 1.1 Cookbook are applicable to version 1.1.3, 1.1.4 and 1.1.5 version of Spring Roo. The Spring Roo 1.2 is currently in the milestone release, and it's final release will come sometime in December or early next year. Here, a few of my recommendations when going through recipes in Spring Roo 1.1 Cookbook:

1 - Use Spring Roo 1.1.5 when working with recipes described in Spring Roo 1.1 Cookbook. 
2 - Don't do copy-paste of commands from eBook to Roo shell. Instead, type it yourself on the Roo shell (you don't need to type everything because Roo offers auto-completion feature)
3 - If you are evaluating Spring Roo for developing an application which makes use of a set of technologies or frameworks, then pay close attention to 'How it works...' section, which describes what all configuration and code is generated by Spring Roo.
4 - If you are using Spring Roo to learn a technology, it is important to focus on 'How it works...' section.
5 - Be prepared to write code or customize the Roo-generated code. A lot of recipes show what to customize and how to customize Roo-generated code.

2 recipes from Chapter 4 of Spring Roo 1.1 Cookbook

2 recipes from Chapter 4 of Spring Roo 1.1 Cookbook are now available at Packt website: http://www.packtpub.com/article/working-with-roo-generated-web-applications

Wednesday, September 28, 2011

What is covered in Spring Roo 1.1 Cookbook

As a follow up to the previous post, here I've detailed what information you'll find in Spring Roo 1.1 Cookbook and for what information you need to refer to other resources.

AspectJ ITDs - Information about AspectJ ITDs and how they are used by Spring Roo is covered in extensive detail. You'll recipes related to Push-in and Push-out refactoring also.


Spring framework and Maven - The Spring Roo Cookbook assumes that you have enough understanding of Spring and Maven. If not, then please refer to Spring reference documentation or any other tutorial or book.

Technology or framework information - Spring Roo Cookbook attempts to give a crash course in JPA, GWT, Flex, Spring Web Flow, Spring Web MVC, Selenium, Solr, and other technologies for which base add-ons are provided by Roo. If you have never used these frameworks, Spring Roo Cookbook woul;d still be an easy read for you. If you are looking for details on these technologies or frameworks, then it is recommended that you refer to some other resources.


OSGi - You'll find some introductory information about OSGi, as this forms the heart of Spring Roo add-ons


Roo-generated code information - This is at the heart of Spring Roo Cookbook. It attempts to cover all the Roo-generated code and configuration information. You'll find information about maven plugins that are configured by Roo in pom.xml file, AspectJ ITDs, Java source code, and so on.


Add-on development - Chapter 7 shows the code generated by Roo for simple and advanced add-ons. It should give you a solid starting point to create your own add-ons. This should give enough information about internal workings of Spring Roo.

How to get the most out of Spring Roo development tool

Let me say this upfront - Spring Roo is not a replacement for a developer's technical skills. It'll only help you to be more productive but don't expect the tool to do everything for you.

To get the most out of Spring Roo, you need understanding of the following areas:

1. AspectJ ITDs
2. Maven
3. Spring framework


The first 3 points address the must-haves for using Spring Roo or you won't be able to understand what's going on when you execute commands. 

4. Good understanding of the framework or technology for which you are using Spring Roo to generate code

This is important if you want to modify the code generated by Spring Roo. For instance, if you don't know Spring Web MVC, then it won't be easy for you to figure out what you need to change to meet your application's requirements.


5. Some understanding of OSGi

If you have some understanding of OSGi, then you can easily understand what add-ons are and why Spring Roo follows add-on based architecture. This could also be helpful if you want to get started with developing your custom add-ons.
 
6. A solid understanding of the code generated by Spring Roo

The code generated by Spring Roo follows best practices and gives a solid foundation for developing your application. This understanding is important if you want to make changes to Roo-generated code to meet specific requirements of your applications.
 
7. A good understanding of add-ons

Not all features that you need are part of base add-ons provided by Spring Roo. So some understanding of how to install and remove add-ons is helpful. For instance, if there is a Portlet add-on, you need to know how to install it in your Spring Roo installation to create portlets.

8. A good understanding of how Spring Roo works when you execute commands from Roo shell


It is important to know how code generation works in Spring Roo. For instance, add-ons are responsible for managing AspectJ ITDs so you should not modify them.

Tuesday, September 27, 2011

Scaffolding a Spring Web MVC application

We saw in earlier two posts that using project command you can create a Java project, and by using persistence setup command you can setup a persistence provider (Hibernate, OpenJPA, and so on).

It's important to note the following when using Spring Roo:
- You don't need to remember commands because Roo is a very user-friendly development tool. You can look at all the Roo commands and their brief description using help command.
- Also, Roo offers auto-completion features - which means you partially type a command or an argument name, and Roo auto-completes it for you.

You can scaffold a Spring Web MVC application from JPA entities using controller all command.

Step 1: Download ch04_web-app.roo script from the Google Code project for Spring Roo 1.1 Cookbook (http://code.google.com/p/spring-roo-cookbook/downloads/list).  Execute ch04_web-app.roo script using script command of Spring Roo. A Roo script contains a sequence of commands which are executed when you execute script command, as shown here:

roo> script --file ch04_web-app.roo

Executing ch04_web-app.roo script creates flight-app Roo project, sets up Hibernate as persistence provider, configures MySQL as the database for the application, creates Flight and FlightDescription JPA entities and defines many-to-one relationship between Flight and FlightDescription entities. If you are using a different database than MySQL or your connection settings are different than what is specified in the script, then modify the script accordingly.


Step 2: Execute controller all command:

.. roo> controller all --package ~.web

The controller all command creates JSPX views, controllers, copies custom tags, default themes, and so on. The package argument specifies the location where the Spring Web MVC controllers are created by Roo.

Step 3. You can now convert the project into an Eclipse IDE project using perform eclipse command. The perform eclipse command generates .project and .classpath files required by Eclipse IDE.

Step 4. You can also run the flight-app application in embedded Tomcat container by exiting the Roo shell (by executing quit command) and executing mvn tomcat:run goal from the command prompt. Now, you access the web application by going to the following URL: http://localhost:8080/flight-app

The following figure shows how the scaffolded web application looks like:


By default, the scaffolded web application allows you to perform CRUD operations on JPA entities, and to search entities based on the dynamic finder methods that you added to them.

Spring Roo 1.1 Cookbook published

I just heard from Packt that Spring Roo 1.1 Cookbook is now available. Spring Roo 1.1 Cookbook provides a comprehensive coverage of Spring Roo development tool features.

For more details, please refer the following links:

1. List of recipes covered in Spring Roo 1.1 Cookbook: https://groups.google.com/forum/#!topic/spring-roo-cookbook/mnM_GJMTto8
2. Book page at Packt: https://www.packtpub.com/spring-roo-1-1-cookbook/book You can download sample Chapter 1 from this page.
3. Amazon link: http://www.amazon.com/gp/product/1849514585/
4. Book review: http://www.owal.co.uk/a/springroocookbook
5. Book source code: http://code.google.com/p/spring-roo-cookbook/downloads/list

Monday, September 26, 2011

Creating JPA entities using Spring Roo

In the previous post we saw how you can create a Java project using project command of Roo. In this post, you'll see that how you can create JPA entities using Roo.

Before we go about creating JPA entities, if you take a quick look at the pom.xml file of flight-app project, you'll see that it contains standard dependencies that you'll typically have in your Spring-based Java projects. The extra dependencies that you see are related to AspectJ and Spring Roo's annotation. You'll also notice that pom.xml configures Eclipse Maven plugin and Tomcat Maven Plugin.

Follow these steps to create a Flight JPA entity:
1. Setup a Hibernate as the persistence provider. Open command prompt and execute persistence setup command, as shown here:

... roo> persistence setup --provider HIBERNATE --database MYSQL
--databaseName myFlightAppDB

provider argument identifier a JPA provider (a couple of JPA providers are supported by Spring Roo)
database argument identifies the database that you are going to use for your application (a couple of databases are supported by Spring Roo)
databaseName argument identifies the name of the database

Executing persistence setup command creates a database.properties file which contains database configuration information (username, password, database name, database driver class). It also creates a persistence.xml file required by the JPA provider.

2. Create a persistence entity using entity command, as shown here:
..roo> entity --class ~.domain.Flight --table FLIGHT_TBL


The entity command shown above creates a Flight.java class (representing a JPA entity) in com.sample.flightapp.domain package. The table argument identifies the table to which the Flight entity maps. You'll see couple of more files created with .aj extension....these AspectJ ITD files, which you should never modify.

The following code shows the Flight.java class:

@RooJavaBean
@RooToString
@RooEntity(...)
public class Flight {...}


As you can see, Flight.java is annotated with couple of @Roo* annotations. These annotations trigger code generation in Spring Roo. The identifier definition, getter/setters for properties defined in Flight.java class, the persistence related methods (create, merge, update, and so on), and the toString methods are all inside the AspectJ ITD files generated by Roo.

The following things to note:
- AspectJ ITD files are like any other Java file, with a slightly different syntax. You don't need to learn a new language to understand AspecJ ITDs.
- The method, constructor, and so on, definitions in AspectJ ITD files are compiled into the corresponding Java source file. In our case, declarations contained in Flight_Roo_Entity.aj file are compiled into Flight class. This means resulting bytecode is not dependent on Roo at all.
- AspectJ ITD files are managed by Spring Roo when you make modifications to Java source file. So, you should not change them.
- If you want to modify a declaration in AspectJ ITD file, you can simply use Push-in Refactoring (using your IDE) to push the declaration (which could be method, attribute or constructor) into the corresponding Java source file. After doing push-in refactoring, you can modify the code manually in Java source file.

In the next post we'll go a step further and scaffold a Spring Web MVC application.


Sunday, September 25, 2011

Creating your first Java project using Spring Roo

Spring Roo is a productivity improvement tool....and you got to use it to believe this. In this post I'll show how to quickly get started with Spring Roo and create a Roo project. I will also talk about some of the artifacts created by Roo.

Note - Some of the information covered in this post are covered in Chapter 1 of Spring Roo 1.1 Cookbook. Once the book is released, Chapter 1 will become freely available. (Update - Sample Chapter 1 of book is now available here: https://www.packtpub.com/spring-roo-1-1-cookbook/book)

Pre-requisite
Install Java SE 6 or later and set JAVA_HOME variable
Install Maven 3.x or later

1. Setting up Roo
Setting up Roo is simple, download the ZIP file from SpringSource website (http://www.springsource.org/roo/start) and unzip into a folder. Now, add path to bin directory of  Roo to your PATH variable.
2. Verify installation
Create a directory named myfirst-app. Open command prompt and go to myfirst-app directory and enter roo on the command line. You'll see the following output if your installation was correct:
    ____  ____  ____
   / __ \/ __ \/ __ \
  / /_/ / / / / / / /
 / _, _/ /_/ / /_/ /
/_/ |_|\____/\____/    x.y.z.RELEASE

roo>

The command prompt now becomes roo> indicating that you are now inside the Roo shell. The output shows the Spring Roo release that you are using. All the commands that you enter now will be processed by Spring Roo. You can think of a Roo shell as nothing but a standalone Java application that processes commands.

3. Creating a project
The first step is to create a Roo project. Though this is called a Roo project, it's just a simple mavenized project. To create a Roo project enter project command of Roo, as shown here:

roo>project --topLevelPackage sample.roo.flightapp --java 6 --projectName flight-app

Created C:\roo-cookbook\ch01-recipe\pom.xml
.....
Created SRC_MAIN_RESOURCES\META-INF\spring\applicationContext.xml
Created SRC_MAIN_RESOURCES\log4j.properties

sample.roo.flightapp roo>

As you can see from the above output, nothing specific to Spring Roo is created. It is like any maven project for creating a Spring-based application. 

topLevelPackage specifies the root package of your project.
projectName specifies the name of the project. This becomes the <artifact-id> and <name> element values in pom.xml file.

The applicationContext.xml file is shown here:

<beans ..>

  <context:property-placeholder
     location="classpath*:META-INF/spring/*.properties"/>

  <context:spring-configured/>

  <context:component-scan base-package="sample.roo.flightapp">

    <context:exclude-filter
                   expression=".*_Roo_.*" type="regex"/>

    <context:exclude-filter expression=
      "org.springframework.stereotype.Controller"   
      type="annotation"/>

 </context:component-scan>

</beans>

As the above listing shows, it contain <component-scan> element to auto-register Spring components. It excludes classes that follow the naming convention *_Roo_* and which are annotated with @Controller annotation.

As you can see, project command simply creates a maven project with some Roo-specific configuration. These Roo-specific configurations are quite limited and you can remove them, when you decide to do so. For instance, you can modify the <component-scan> shown above to exclude Roo-specific exclusion rule, and you can use this project as any other Spring project.

In the next post, we'll look at how create a JPA entity and import the flight-app project into Eclipse or STS or IDEA IDE.

Tuesday, September 20, 2011

Creating service layer in Spring Roo

In Installing an installable add-on recipe of Spring Roo Cookbook, I showed how to download and install gvNIX add-on for creating Services in your Roo-based application.
Spring Roo 1.2 M1 adds a new service command which you can use to create service layer of your application, as mentioned in this Spring Roo blog entry.


Saturday, September 17, 2011

Source code of Spring Roo 1.1 Cookbook

The final source code of Spring Roo 1.1 Cookbook is now available at Google Code project: http://code.google.com/p/spring-roo-cookbook/downloads/list

If you have any questions, then please post it in the forum for Spring Roo Cookbook: https://groups.google.com/forum/#!forum/spring-roo-cookbook

Thursday, September 15, 2011

List of recipes in Spring roo cookbook


Chapter 1: Getting started with Spring Roo
1.       Setting up Roo
2.       Getting help and hints from Roo
3.       Creating a Roo project
4.       Configuring logging
5.       Importing Roo project into Eclipse/IntelliJ IDEA IDE
6.       Viewing properties defined in a properties file
7.       Managing properties defined in a properties file
8.       Creating a  Java class
9.       Adding attributes to a Java class
10.   Creating a Java interface
11.   Referring to a type from Roo shell
12.   Creating application artifacts from Roo script

Chapter 2: Persisting objects using JPA
1.       Setting up a JPA provider for your project
2.       Viewing database configuration properties
3.       Managing database configuration properties
4.       Creating persistent entities
5.       Adding JSR 303 constraints to persistent fields
6.       Creating integration tests for persistent entities
7.       Creating new ‘data on demand’ for testing entities
8.       Creating mock tests for persistent entities
9.       Executing persistent entities tests
10.   Controlling auto-generated methods of persistent entities
11.   Creating applications that interact with multiple databases
12.   Packaging your Roo project

Chapter 3: Advanced JPA support in Spring Roo
1.       Viewing candidate dynamic finder methods
2.       Adding dynamic finder methods to an entity
3.       Creating many-to-one (or one-to-one) relationship between entities
4.       Creating one-to-many (or many-to-many) relationship between entities
5.       Creating a mapped superclass
6.       Customizing Roo-generated identifier definition
7.       Generating database metadata
8.       Creating entities from database

Chapter 4: Web application development with Spring Web MVC
1.       Auto-generating Spring MVC controllers and JSPX views from JPA entities
2.       Packaging, deploying and using Roo-generated Spring MVC application
3.       Modifying Roo-generated views
4.       Round-tripping support in Spring Roo for web controllers and views
5.       Creating a Spring MVC controller for a specific JPA entity
6.       Manually creating a Spring MVC controller for a JPA entity
7.       Adding static views to Roo-generated web application
8.       Internationalizing Roo-generated web applications
9.       Adding or modifying themes generated by Roo
10.   Adding JSON support to domain objects and controllers
11.   Creating and executing selenium tests for web controllers

Chapter 5: Web application development with GWT, Flex and Spring Web Flow
1.       Scaffolding GWT application from JPA entities
2.       Getting started with Flex application development
3.       Scaffolding Flex application from JPA entities
4.       Getting started with Spring Web Flow

Chapter 6: Emailing, Messaging, Spring Security, Solr and GAE
1.       Sending emails using JavaMail API
2.       Sending and receiving JMS messages
3.       Configuring Spring security for your application
4.       Using Spring Security with Apache Directory Server
5.       Deploying a GWT application on GAE
6.       Deploying a Spring Web MVC application on GAE
7.       Adding search capability to your domain model with Solr

Chapter 7: Developing add-ons and removing Roo from projects
1.       Setting up GnuPG for add-on development
2.       Installing an installable add-on
3.       Developing a simple add-on
4.       Developing an advanced add-on
5.       Converting non-OSGi JDBC drivers into OSGi-compliant bundles
6.       Removing Roo with push-in refactoring
7.       Adding Roo to a project using pull-out refactoring
8.       Upgrading to latest version of Roo

Wednesday, September 14, 2011

Spring Roo Cookbook status

Spring Roo Cookbook is now complete and is scheduled to go into print next week.

Monday, August 1, 2011

Status of Spring Roo Cookbook

The book has now entered production and I'm currently doing pre-final review of Chapter 4. I think starting next week, I'll start receiving comments from copy-editor and technical editor of the book. I expect that the book will be published as per the revised date of 31st September. I'll publish a revised list of recipes sometime towards the end of August to reflect the recipes that will be in the printed book.

Monday, June 27, 2011

Spring roo cookbook review by Alex

Thanks to Alex McLintock for writing the first review of Spring Roo Cookbook.
The review is available here: http://www.owal.co.uk/a/springroocookbook

Sunday, June 12, 2011

Roo is for developers

Since Spring Roo 1.0 I've used it in implementing multiple PoC (Proof of Concepts) and applications. I've found it most useful when you understand the underlying Spring and related frameworks, that form part of your application. Roo only generates CRUD operations and UIs, which is not necessarily the case in most real-world applications. Also, you may not use JPA to implement your persistence layer (though Roo is making big leaps towards incorporating support for NoSQL and graph databases). Still, in its current form, it does a lot of heavy lifting to save time in implementing any PoC or application in which Spring plays an important role in the middle-tier.

In many many cases, I used Roo to generate a Spring Web MVC application against a throw-away JPA layer and I moved out of Roo, and  modified the roo-generated application as described here:
1. Deleted the JPA layer, and instead used an in-memory cache or a NoSQL database. Added my own DAO layer for interaction with the cache or NoSQL database.
2. Deleted UI layer of the application, as it was not required in some cases.
3. Modified roo-generated web-tier controllers as per the application requirements. The controllers were accessed via Spring remoting or via HttpClient for sending/receiving JSON objects.
4. Created service layer of the application.
5. Modified pom.xml to not use compile-time weaving and removed or added maven plugins that I needed in the application.
 
It's amazing how fast you can go about developing applications if the boilerplate code and configurations are generated by a tool like Spring Roo, and all you need to do is to tweak the code/configuration to quickly get started with doing what is important, and this is - writing business logic.

Saturday, June 11, 2011

Monday, May 16, 2011

Chapter 5 coming soon

I'm in the process of completing Chapter 5 - Web application development with GWT, Flex and Spring Web Flow. This is a long chapter, close to 56 pages and covers details of how you can scaffold GWT and Flex applications from JPA entities and the support provided for Spring Web Flow.


Following are the recipes covered in this chapter:

1. Scaffolding GWT application from JPA entities
2. Getting started with Flex application development
3. Scaffolding Flex application from JPA entities
4. Getting started with Spring Web Flow

Sunday, April 24, 2011

Roo is not just for CRUD operations

In recent times I met couple of developers who are always skeptical about using a Rapid Application Development tool, like Spring Roo. The main limitation cited after going through a tool like Spring Roo is that it is best fit to scaffold a CRUD user interface. I agree with the developers to some extent because Spring Roo scaffolds user interface which performs CRUD operations on JPA entities. BUT, this perspective is from developers who perceive that user interface is the only important part of an enterprise application. There is lot more to Spring roo, which some developers fail to see. For instance, using Spring roo you can easily develop a sophisticated JPA entity model, consisting of relationships and finder methods.
If you go a little deeper into the Spring roo architecture, and understand the importance of using AspectJ to contain roo-managed code, you'll find that Spring roo is doing lot of heavy lifting behind the scenes to generate the boilerplate code, so that you can only focus on writing the business logic.


Bottomline
A good understanding of what Spring roo does in response to executing a command from roo shell can greatly reduce the amount of boilerplate code you have to write to create an enterprise application. When creating a Spring Web MVC/GWT/Flex application or incorporating Solr, messaging, emailing,Spring security features in your application or developing applications for GAE, lot of configuration information needs to be provided in web.xml or module descriptor or flex configuration file or Spring's application context or web application context file. If you are using Spring roo, most of this configuration is automatically created for you in respective configuration files. 
Roo also manages your pom.xml and configures plugins (like GWT plugin, GAE plugin, Tomcat plugin, Eclipse plugin, IntelliJ IDEA plugin, and so on) and adds project dependencies which greatly boost developer productivity. If you have an understanding of scaffolded Spring Web MVC or GWT or Flex application, then you can also quickly modify it to meet your enterprise application requirement.
Roo is a fast-growing tool and with every new release you see lot more features that can further improve developer productivity. For instance, JSF add-on is planned in the near future, which will simplify developing JSF applications.

Thursday, April 21, 2011

Things that I like about Spring roo

Its been a while since I started working on Spring Roo and in this post I'll summarize my experience working with Spring roo and why I always recommend it to everyone developing Spring-based applications.


1- Tab-completion feature of roo shell while entering commands. If you use tab completion feature while entering roo commands, you'll find that it brings down the learning curve for the tool. You don't need to remember commands word-by-word and let roo help you with find your command. 
2 - Roo's help command gives you enough information about the command. So, if you don't know what optional or mandatory arguments you have to enter for a command, either use tab or simply execute the help command.
3 - Maven-ized project is created with the project command. You have your compiler plugins, eclipse and IntelliJ IDEA IDE plugins pre-configured in your pom.xml file.
4 - Sophisticated support for creating JPA entities. You can specify relationships via roo commands and let roo handle the code generation.
5 - Scaffolding  of GWT, Spring Web MVC, Flex, and so on applications from JPA entities.
6 - Best practices followed in code generation. You can be sure that the code follows the best practices in Spring application development.
7 - Spring roo is for developers who understand Spring, JPA and other technologies used in the application. You can create a simple CRUD application from roo within minutes but if you need to modify the code, then you need to understand the code thoroughly. This is where Spring Roo Cookbook comes into picture :)
8 - One of the most important feature of Spring roo is round-tripping support. If you change a JPA entity, the changes are reflected in the scaffolded GWT and Spring Web MVC applications. This makes it possible to use Spring roo throughout the development of your project.
9. Spring roo will never overwrite the methods that you write. Roo-managed code resides in AspectJ ITDs, and if you never modify the ITDs you can be sure that your code in Java source files will remain intact.
10. You can provide a custom implementation for a roo-generated method in AspectJ ITD by re-defining the method in the corresponding Java file.  So, if roo-generated method in AspectJ ITD doesn't meet your requirement, you have a way to customize it.
11. You can extend roo by writing your own add-ons and deploying it. It may be a bit tricky in the beginning to write an add-on but a quick look at existing add-ons can give you fair amount of idea of how roo generates code. Roo provides commands to create a simple or an advanced add-on to give you a kick-start at writing add-ons.
12. Configuring a maven plugin can be a pain sometimes. Roo-generated applications contain the plugin configuration which simplifies development. For instance, GWT plugin is configured by roo in pom.xml when you scaffold a GWT application from JPA entities, and GAE plugin is configured when you create an application for GAE.
13. Roo supports creation of integration tests for JPA entities
14. Roo supports creation of Selenium tests for Controllers.

Thursday, April 14, 2011

Chapter 6 coming soon

Chapter 6 of Spring roo cookbook will be launched by early next week. Following are the details:
[Chapter 6] - Emailing, Messaging, Spring Security, Solr and GAE [approx. 80 pages]
1. Sending emails using JavaMail API
2. Sending and receiving JMS messages
3. Configuring Spring security for your application
4. Using Spring Security with Apache Directory Server (recipe that makes use of embedded Apache Directory Server and demonstrates use of Web request security and method-level security in roo-generated web application).
5. Deploying a GWT application on GAE
6. Deploying a Spring Web MVC application on GAE (this recipes shows developing a simple Spring Web MVC application and creating owned one-to-many relationship between JPA entities) 
7. Adding search capability to your domain model with Solr 


If case of questions regarding Spring roo cookbook, post it here: http://groups.google.com/group/spring-roo-cookbook